Sub-Total: $ 0.00
4″ Filter Replacement O-Rings
P # 425

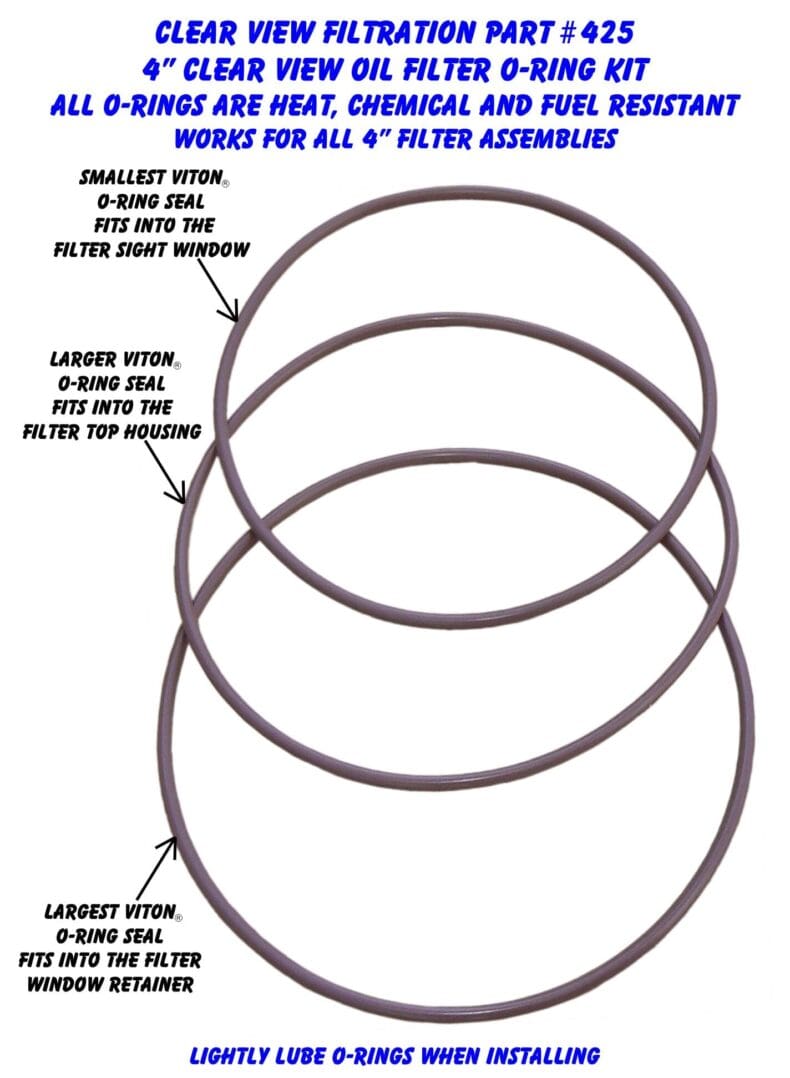
4” Filter O-Ring Kit has Three O-Rings are for use with all 4” Hi-Flow, Dry-Sump and Screw-On See Through Filter Assemblies. O-Rings are made of Viton® which is heat, fuel, solvent, and chemical resistant.
Part # 425
$ 11.95
Description
Clear View Filtration 4” Filter O-Ring Kit has Three O-Rings are for use with all 4” Hi-Flow, Dry-Sump and Screw-On See Through Filter Assemblies. O-Rings are made of Viton® which is chemical and fuel resistant.
- CVF Part Number: 425
- O-Ring Material: Viton®
- O-Ring Color: Brown
- O-Ring Thickness: 3/32”
- Quantity: Sold as Kit of 3
Notes: Can only be used with 4” See Through Filter Assemblies. Lightly lube O-Rings when installing.
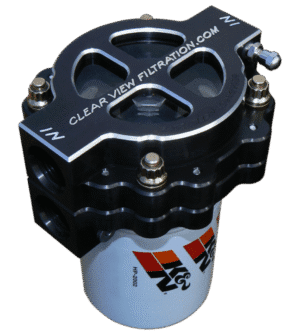
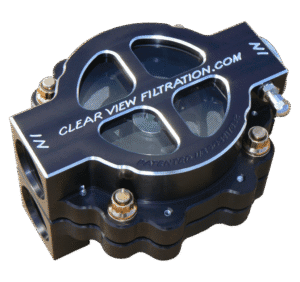
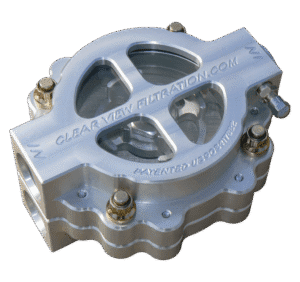
Description: The 4” Filter Replacement O-Ring Kit is for use with all 4” Hi-Flow, Dry-Sump and Screw-On See Through Filter Assemblies. This Kit consists of three O-Rings. The smallest of the three fits into the sight window. The larger O-Ring fits into the filter top housing and the largest O-Ring fits into the window retainer. All O-Rings are made of Viton® which is heat, chemical and fuel resistant. Recommended to install new O-Rings into See Through Filter when replacing the sight window in all 4” filter assemblies
Images & Directions (if available):
Detailed View with Components Explained
Steps on How to Replace See Through Filter Window using O-Ring Kit:
- Before you start you should have the following: Replacement See Through Polycarbonate Window, Replacement O-Ring Kit, Non-Chlorinated Break Clean, Paper Towels, Vaseline or any light weight Oil, Pint size Paint Can or a Roll of Duct Tape or Electrical Tape.
- Remove the old window from the housing by taking the filter top housing apart from the filter base, turning it over and removing the eight small Allen head bolts that hold the retainer in place. Take aluminum Retainer out. The old window can then be pushed out from the top side of the filter housing using your fingers. This might take some force due to the O-Rings that seal it in place. Remove the two O-Rings stalled in the filter top for inspection.
- Clean aluminum surfaces with Non-Chlorinated Break Clean and inspect for any possible visual damage.
- Next Lubricate all O-Rings and Install the Largest O-Ring in to the Retainer Groove, Install the Medium size O-Ring into the Filter Housing Groove, and the Smallest O-Ring install into the Replacement Window Groove. It is recommended to place the window on a similar size apparatus to lift it off of your working surface. Suggest a pint size paint can for either the four or 6 inch. You could also use two rolls of electrical black tape stacked for the 4 inch and / or a roll of duct tape for the 6 inch. **Make sure to put a paper towel over anything used to lift the window off the table to make sure window stays clean.
- Have the replacement Window sitting with O-Ring stalled into the Groove facing up on the apparatus, lifting it above the work surface. Then take the Filter Top with those O-Rings installed already and turn it over like you were looking down through it. Press the housing down squarely onto the new window, you should hear a pop noise when it is fully installed. Warning ** It would be very difficult to push the window in from behind only using your fingers **.
- After the window is reinstalled, put the retainer back in its groove of the filter housing, reinstall and tighten the retainer mounting bolts, and reassemble filter top to the base.
Additional information
| Weight | 0.03125 lbs |
|---|---|
| Dimensions | 3.5 × 6 × 0.1 in |
Recommended Replacement Parts for Purchase
You may also like…
-

4″ Hi-Flow Filter Assembly
$ 554.95 Add to cart
P # 410-115 & 410-115-B – Clear Anodized Finish -
4″ Screw-On Filter Assembly
$ 584.95 Add to cart
P # 400-115 & 400-115-B – Black Anodized Finish -
4″ Dry Sump Filter Assembly
$ 674.95 Add to cart
P # 445-115 & 445-115-B – Black Anodized Finish -
4″ Hi-Flow Filter Assembly
$ 554.95 Add to cart
P # 410-60 & 410-60-B – Clear Anodized Finish

You May Also Like
Related products
-
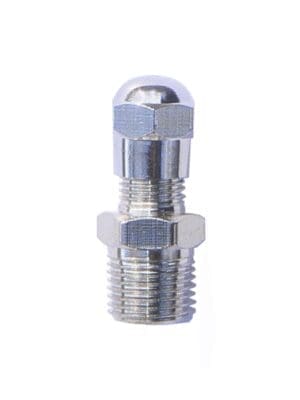
Filter Replacement Air Fitting
$ 6.95 Add to cart
P # 148 -
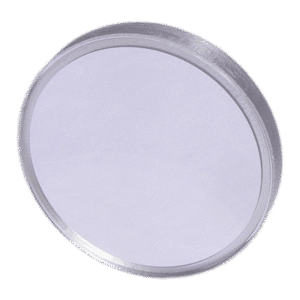
4″ Filter Replacement Windows
$ 24.95 Select options This product has multiple variants. The options may be chosen on the product page -
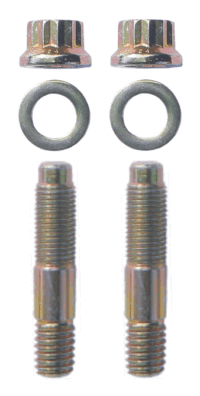
Filter Replacement Stud Kit
$ 16.95 Add to cart
P # 135 -
6″ Filter Mount Flange for 2.375″ Holes
$ 20.95 Add to cart
Part Number 177